Category: Tech Analysis | Reading Time: 9 Minutes
Mastering low light urban photography is the ultimate technical challenge for any architectural documentarian. When you step inside a massive abandoned factory or a windowless asylum basement, you are immediately confronted with a lack of usable illumination.
Capturing the haunting beauty of these spaces requires more than just a expensive camera. You must understand the complex relationship between aperture, shutter speed, and sensor sensitivity. This technical analysis breaks down the specific settings and equipment you need to produce professional results in the most challenging lighting conditions imaginable.
1. The Necessity of a Full Frame Sensor
While modern smartphones have improved significantly, they still struggle with the extreme demands of low light urban photography. The physical size of the camera sensor is the most important factor in image quality.
A full frame sensor has a much larger surface area than a cropped sensor or a phone chip. This allows each individual pixel to gather more light during the exposure. When you are working in a pitch black hallway, a larger sensor significantly reduces the amount of digital grain or noise in your final image. This results in much cleaner shadows and better color accuracy in the darkest corners of the room.
2. Choosing the Right Lens Aperture
Your choice of glass is just as important as your camera body. For low light work, you need a fast lens with a wide maximum aperture. Lenses with a maximum aperture of f2.8 or wider allow a massive amount of light to hit the sensor.
However, there is a technical trade off. When you shoot at a very wide aperture, your depth of field becomes incredibly shallow. This might look artistic for a close up of a dusty artifact, but it can make an entire room look blurry. For wide architectural shots, you will often need to stop down to f8 or f11 to ensure the entire scene is sharp. This means you must compensate for the loss of light by using a much slower shutter speed.
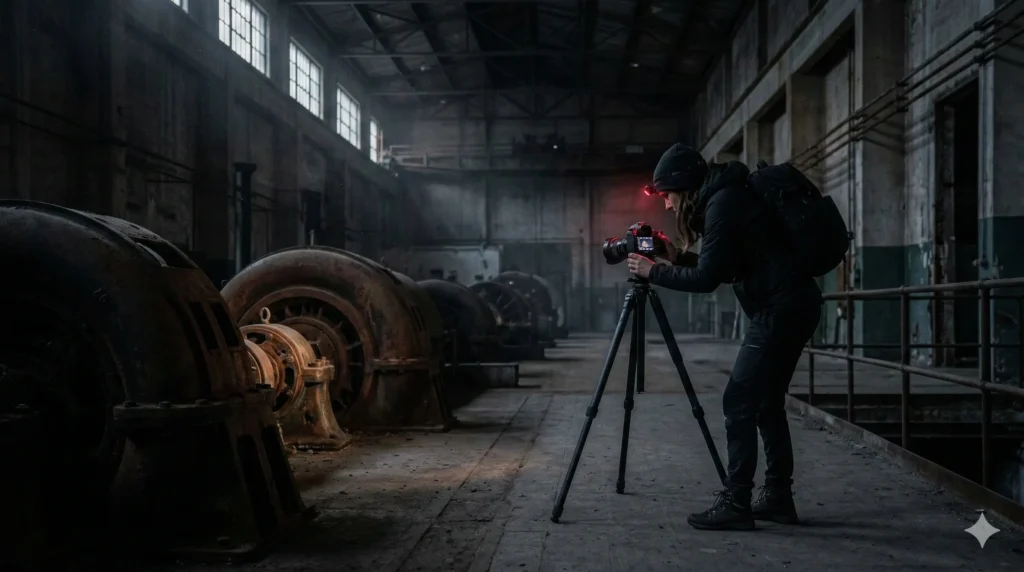
3. The Role of the Heavy Duty Tripod
Because we often need to use slow shutter speeds to capture enough light, holding the camera by hand is completely impossible. Even the smallest vibration from your heartbeat will cause the image to look blurry.
A heavy duty tripod is the most essential piece of gear in your kit. It allows you to keep the shutter open for thirty seconds or even several minutes if necessary. This long exposure technique allows the sensor to soak up every single photon of light available in the room. To ensure total stability, use a remote shutter release or the built in timer on your camera. This prevents the physical act of pressing the button from shaking the camera during the exposure.
4. Balancing ISO and Digital Noise
ISO represents the sensitivity of your camera sensor to light. In the past, photographers were told to always keep their ISO as low as possible to avoid digital noise. While this is still a good general rule, modern professional cameras have incredible high ISO performance.
When you are shooting in a truly dark environment, you may need to raise your ISO to 1600 or even 3200 to see any detail at all. The key is finding the sweet spot where you get a bright enough image without introducing too much colored grain. Most modern editing software can remove a reasonable amount of noise, but it is always better to get the cleanest raw file possible while you are still on the property.
5. Mastering Manual Focus in the Dark
Auto focus systems frequently fail in low light urban photography. The camera lens will simply hunt back and forth because it cannot find enough contrast to lock onto a subject.
You must learn to use manual focus. Switch your camera to live view mode and find a small point of light, such as a reflection on a piece of glass or a distant window frame. Use the digital zoom on your screen to magnify that area and turn the focus ring until the edges are perfectly sharp. If the room is completely black, use a powerful tactical flashlight to illuminate a specific object, lock your manual focus, and then turn the light off before starting your long exposure.
Conclusion
Achieving professional results in dark environments is a slow and methodical process. It requires patience and a deep understanding of your equipments limitations. By combining a sturdy tripod with the correct manual settings, you can transform a dark and dingy basement into a stunning work of photographic art.
Over to you: What is the most difficult lighting situation you have ever encountered in the field? Did you use a tripod or did you try to shoot handheld? Share your technical tips in the comments below!